Getting Started 1: sign-in, run a study
AUGUST 8, 2016
Since we revolutionised racing car simulation with the Canopy Platform, we’ve understandably had a lot of questions about how it works and how teams can use it whilst keeping all of their data secure. In this series of articles I’m going to run through the steps that new platform users follow to get up and running with the most powerful motorsport simulation tool in the world.
In this first instalment we’re going to sign-in to the platform as a new user and configure, run, and explore a 20-lap sweep of car mass. In the second instalment we will go through parameterising the Canopy model with your own car’s data. In the final instalment we will import some telemetry from the track and tune our car’s parameters to bring simulation results into close alignment with telemetry.
Step 1: Sign-in
When you sign up for your 50 day evaluation on the Canopy Platform you will receive several things from Canopy:
Sign-in details for you and all of the team-members that you have nominated.
Access to our comprehensive documentation in the Canopy Wiki.
A format template for importing vehicle telemetry (custom formats can be accommodated on request).
A request to arrange a visit from one of us to help you and your team to get set up and quickly start to simulate your car and get useful results.
Behind the scenes, the following things will have been done in preparation for your team starting to use the platform:
Creation of your team’s account as a ‘tenant’ of the platform.
Reservation of a dedicated pool of cores in the cloud for running your team’s simulations.
Creation of a dedicated database solely for your team’s parameter data (car files etc.).
Creation of a dedicated, secure cloud storage container solely for your team’s results.
Creation of individual user accounts for all of your nominated team members.
So as you can see, by the time you have received your sign-in details from us, your account is all ready and waiting for you. All identifying company and user information is encrypted before being stored and no user can see any information from outside of their team’s account. No user from outside your team, including Canopy itself, will see any of your data, whether it be parameters, tracks, results, or anything else. The only thing that Canopy can see is how many simulations you’ve run of each type — this information is also visible to you.
Your secure account has been set up, and you’ve been sent your sign-in details, let’s get going: go to portal.canopysimulations.com (on any device) and you’ll find the sign-in screen:
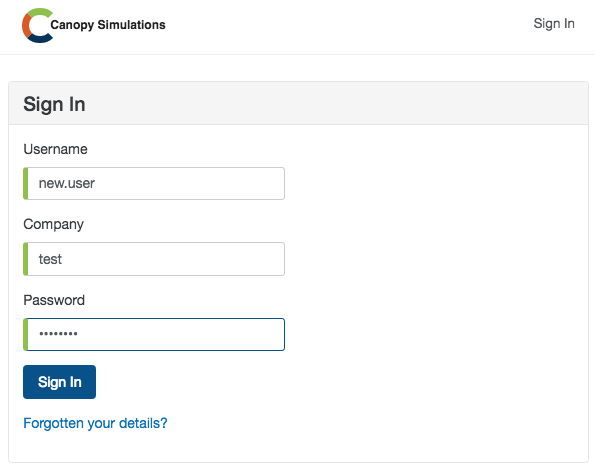
Step 1: Sign-in to your team’s account using your new user details.
Entering your newly acquired credentials will land you on your team’s homepage where you can access your team’s virtual garage of cars, library of tracks etc., and compendium of results from past studies (once you’ve run some).
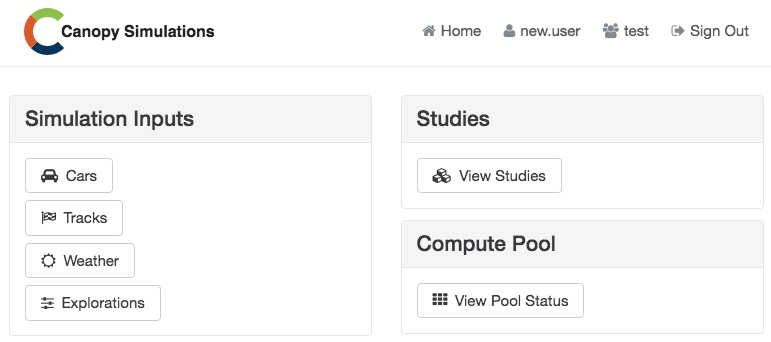
Step 1: Your team’s home screen.
Step 2: Run a Simulation Study
For a start let’s run a simple sweep of car mass with a default car around Barcelona, everyone’s favourite test track. For this we will first require a car; click on ‘Cars’, then click the up arrow next to ‘Canopy Car’ to stage the default car. The staging area will appear at the top of the screen, showing which pre-requisites have been selected:
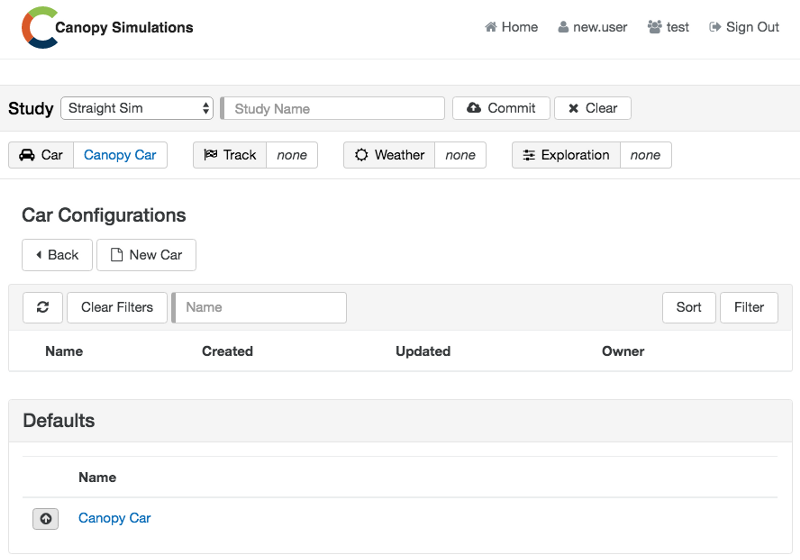
Step 2: The study staging area appears at the top after selecting the Canopy Car. Below is a list of user-created cars (currently empty) and a list of default cars provided by Canopy.
Now we can see (from the study staging area) that we will also need a Track, Weather, and an Exploration to run a study. Clicking on each of the symbols for these will bring up the relevant library of your team’s items together with the included default items provided by Canopy. At this stage your team won’t have any items of it’s own, so we simply select default items for the Track and Weather prerequisites.
Once we’ve selected Barcelona-F1 as the Track and 25 deg, dry as the Weather for this study, we’ll define our own exploration by selecting New Exploration under the Explorations heading. This will present us with the following editor view:
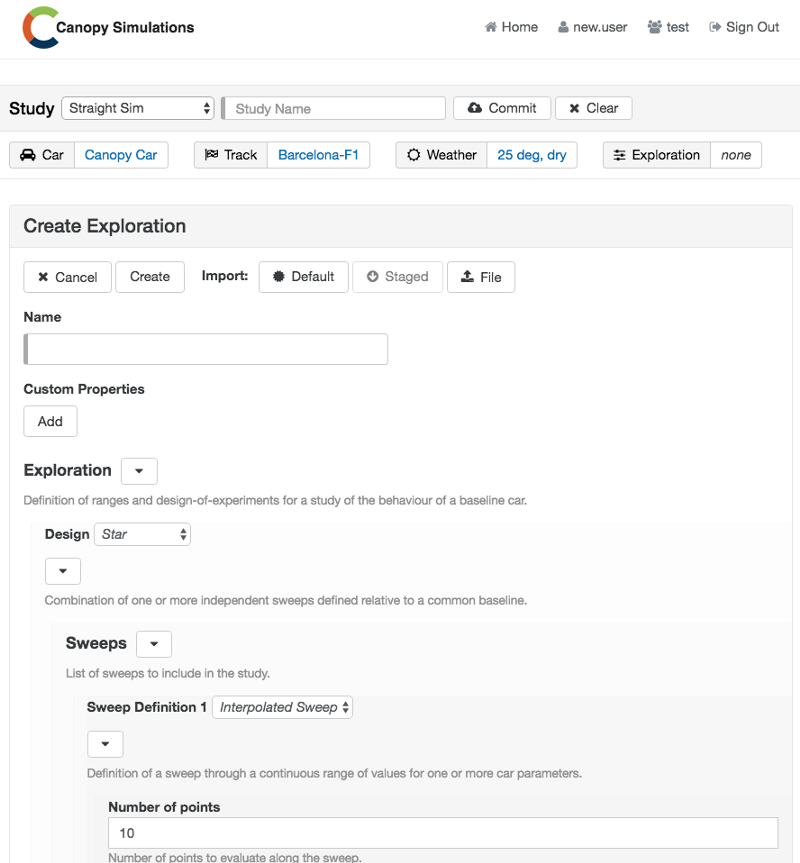
Step 2: The Exploration editor view, where we define which parameters we’d like to explore with this study.
Here’s where we define the parameters we’d like to explore in a particular study, in this case we’re just going to do a set of 20 lap-simulations at different values of car mass to get an accurate number for the fuel-mass-effect. Give an appropriate title to your exploration, set the number of points to 20, then under Sub-interpolation 1 we’ll set the parameter path to car.chassis.mCar (don’t worry, the parameter paths are obvious once you’ve edited a car [see the second instalment in this series]), the value type to additive and finally, the start and end values to 0 and 100 respectively. This tells the platform to run 20 different simulations, starting with the baseline car +0kg of extra mass, and ending with the baseline car +100kg of extra mass, with the intermediate values spaced evenly between those extremes. Once that’s done you should have an exploration editor that looks like this:
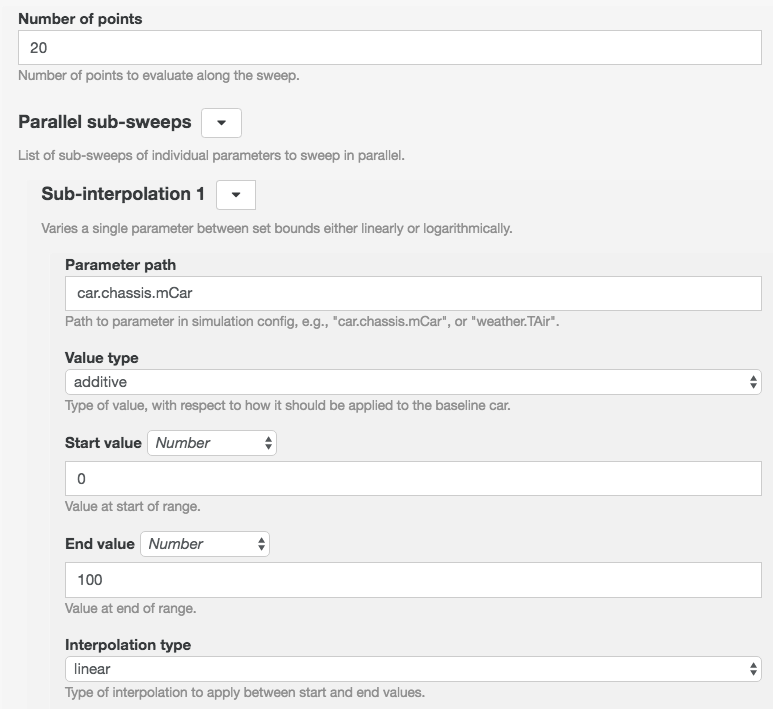
Step 2: The definition of a 20-lap sweep from +0kg of mass to +100kg.
Clicking Create will create a new exploration with these details and save it in your team’s list of available explorations; click the up arrow next to the new item to stage this exploration. Now we have staged a Car, a Track, some Weather, and an Exploration, we are nearly ready to go. Select Quasi-Static Lap from the list of simulation types in the study staging area and give your study a name. Finally, click Commit to federate the running of your 20 lap simulations over your team’s dedicated pool of cloud computing cores. This will leave you with this view:
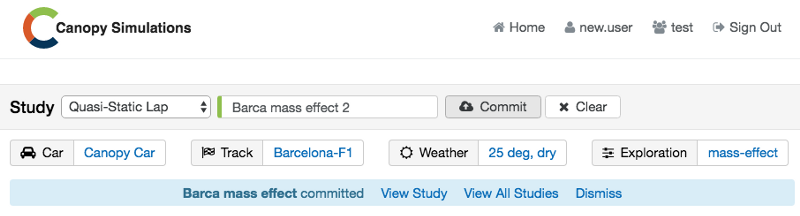
Step 2: The view once the study has been committed for execution in the cloud.
We can watch the progress of our study by clicking either View Study or View All Studies in the blue banner. You can see the simulations come in as they are completed, the time taken will depend on the level of your subscription, but even with the lowest level of subscription, with 5 cores available, this 20-lap study will be completed in only a couple of minutes:

Step 2: The View All Studies page shows that this 20-lap study took only 3 minutes to complete even with the minimum subscription level of 5 cores in the computing pool.
Step 3: Explore the Results
Clicking on the name of the study will show you the completion time, present the prerequisites to make it easy to re-stage any or all of the elements and reproduce this study, and the results for the whole sweep in the form of the following chart:
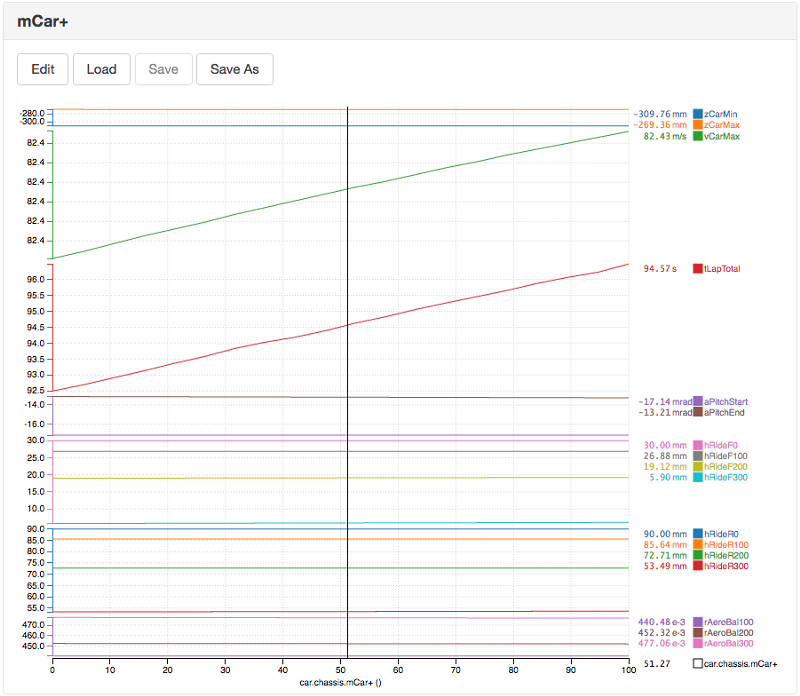
Step 3: Scalar results from 20 simulations are plotted against the parameter we chose to sweep, car mass.
At a glance we can see that the lap-time sensitivity to mass is very linear (all 20 simulations form a straight line) and by moving the cursor we can read off the numbers in the legend and extract the gradient of the red lap-time line — in this case we have a change of 3.98s for 100kg added, or 0.0398s/lap/kg.
To compare the laps themselves we can click on view jobs, and then click the chart symbol next to one or more laps to bring up the chart staging area; clicking Overlay will bring up the telemetry overlay and the linked track viewer:
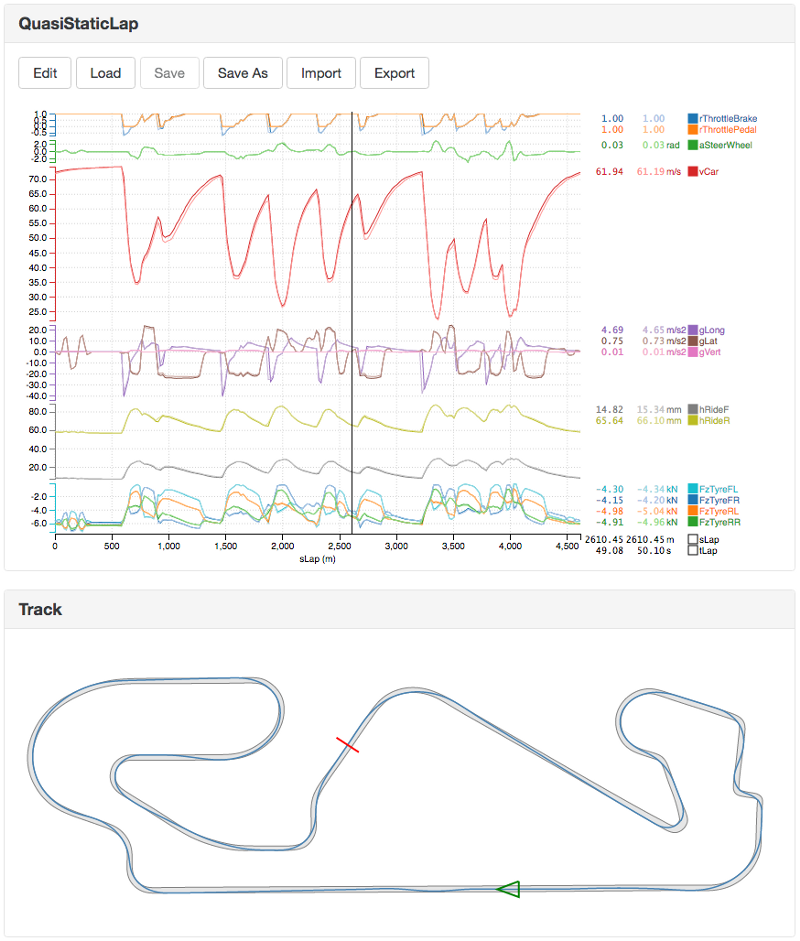
Step 3: An overlay of the first and 10th laps in the sweep shows the effect of the extra mass.
So there we have it, in just a few minutes we’ve signed-in to the platform for the first time, staged a car and a track, configured a 20-lap sweep, run those 20 simulations in the cloud and viewed the results, both as a whole sweep and as a pair of particular laps. The lap-time sensitivity to added mass for the default Canopy car has been found to be 0.0398s/lap/kg.
In the next instalment of this Getting Started series we’ll explain how to parameterise the Canopy car model with your team’s known car parameters. in the final instalment we’ll complete the parameterisation of the car by validating the simulation results against real car telemetry.